|
During this assignment we were told you use a picture of a cloud that Mr. Means had taken. To flip it horizontally and use a layer mask with a gradient to blend the two halves together. After Making the image symmetrical I used Command-Alt-Shift-E to make a new layer that was of what I already made. With the layer I had created with Command-Alt-Shift-E I flipped it vertically. Finally I had duplicated everything that I had done up to this point then I rotated the layer 90 degrees. With the layer I just rotated I then used a layer blending mode to have the cloud show through. Then cropped out the parts that were still showing to make the image a square.
0 Comments
During this assignment we were told to take a photo of an object that is outside. I first flipped the image horizontally and used a layer mask to make the image symmetrical. After Making the image symmetrical I used Command-Alt-Shift-E to make a new layer that was of what I already made. Finally I had duplicated everything that I had done up to this point then I rotated the layer 90 degrees. With the layer I just rotated I then used a layer blending mode to have the cloud show through. Then cropped out the parts that were still showing to make the image a square. Then Juan had though of a brilliant idea to rotate the image again at a 45 degree angle and it ended up looking really awesome.
This pattern was made of different symbols that I got from a branch of the symbols tool called florid vector pack. The original object in the pattern had two of the same object reflected to make the object symmetrical. Before I started making the pattern I saw someone else's pattern and thought that I looked victorian so I ended up making a couple that appear as if they were a victorian wallpaper. The two tutorial that I watched were the radial balance and the creating patterns just to refresh my memory on where I can access them in Illustrator.
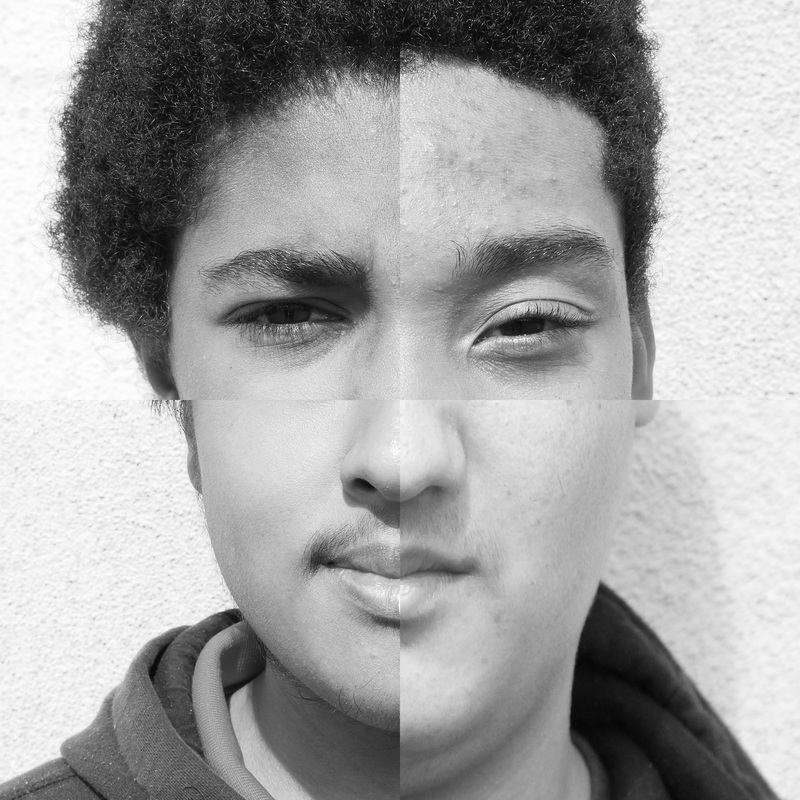 What we were told to do in this project is use a 4th of someone's face to make a whole face. The top left is Kobe Lawson, Top Right is Marquis Hunter, Bottom right is me, and the Bottom left is Mitchel Chareunsouk. I noticed that my lips and Mitchel's lips didn't line up correctly so I use the puppet warp tool to make my lips line up correctly. I want people to notice that my lips and nose line up with Mitchel's lips and nose.
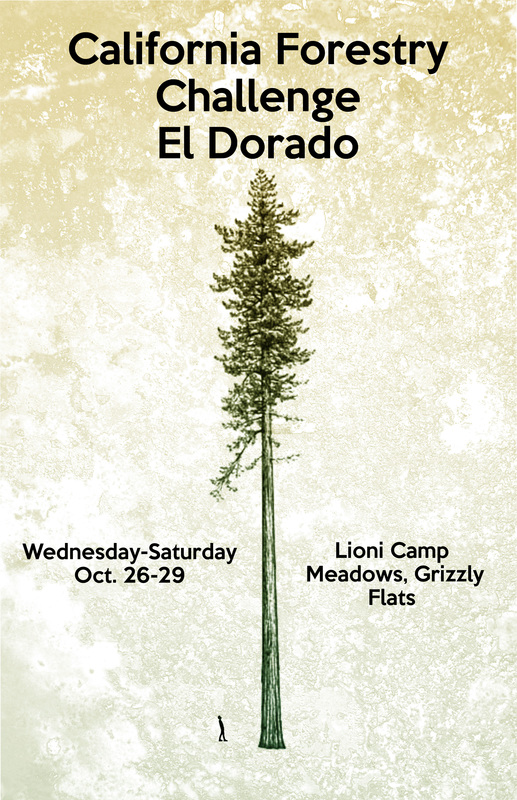 When we were first told about the poster project I immediately thought about making a advertising poster for forestry challenge. I made the Redwood Tree the focal point of the poster because in the book we are reading for forestry has a lot of information about Redwood Trees. When choosing the font I wanted to get a font that the closest to the font that is on the official website. The poster has a gradient of the entire image on a layer blending mode. I learned how to make a custom brush and I used it to make a image that I had and like larger than the original image.
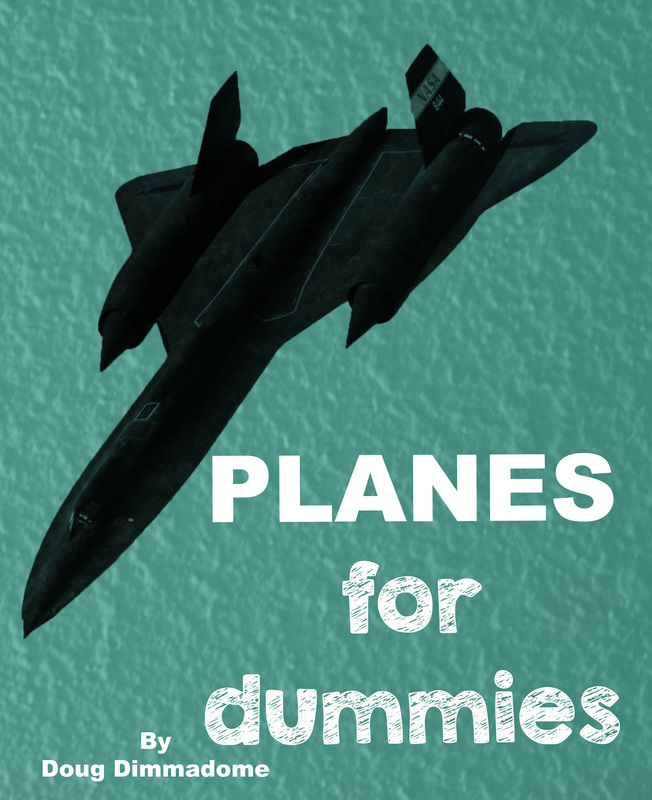 When thinking of what I could make a custom brush out of I turned a around and saw that Aidan was looking at planes. Then, I thought that it was a great idea so I started looking at jet planes. When looking through the jet planes I remembered playing BO1 and the mission where you got to be the pilot of one of these planes.
For this assignment we were told to take a photo were we could have a image from the internet look like it is coming out of us. To make the image just show up where I wanted it to go I used a layer mask. After using the layer mask for the image, I used an Adjustment Layer to make the subject black and white. I also used Adjustment Layers to make my background more vibrant that the color I sampled from the image that is over the subject.
|
AuthorWrite something about yourself. No need to be fancy, just an overview. Archives
November 2016
Categories |
 RSS Feed
